Matching checks on your dressmaking projects can seem like a daunting task, but armed with my top tips and a bit of patience and time it can be a hugely satisfying and rewarding part of making your own clothes!
In this post I'll work through an example of how to match checks on one of my favourite all time shirt patterns, but no matter what project you are working on these tips and guidance will tell you all you need to know to get those checks to match! You can also apply a lot of these principles to matching something like a large print.
Check out my latest Youtube video below by clicking or tapping the image and read on for lots of pictures and advice you can refer back to!
Introduction and general tips
My first and main tip, which I think is important before tackling a project where you will match the checks, is only do it if you are going to enjoy the process!
Check matching does take extra time and effort, especially at the cutting out and preparation stage. Sewing and dressmaking should be fun so if it’s going to stress you out, it might be best to focus on a different type of fabric - or embrace the checks not matching!
If you are dead set on going ahead, my next piece of advice is - don’t be hard on yourself or set unrealistic expectations! If you have a look at any ready to wear clothes, chances are they will not be check matched or done to complete perfection! There is no such thing!
Choosing a project - if it's your first time matching checks or you are still building up your dressmaking skills start with something simple - less seams and details like darts and tucks will make it an easier job.
Cutting on the bias - To make things easier for yourself, cut elements on the bias. Bits that work well are: yokes, pockets, shirt plackets, side panels on a princess seam dress and waistbands. This will also add visual interest to your garment. These bits will need handling with care as they can easily stretch out and distort. It’s best to reinforce them in some way, either with interfacing (good for waistbands/plackets) or with fabric (such as a yoke).
Matching small checks - If your fabric has a very small check pattern then I wouldn’t worry about matching this. But do make sure that the pattern is straight - you can apply some of my tips below to help with this.
Check vs plaid fabric - what is the difference?
You might have heard of both of these terms before, sometimes they can even get used interchangeably but there is a difference!

Checks
Checks have two colours and have the same stripe pattern in the warp and weft making the finished cloth symmetrical.

Plaids
Plaids have more than two colours with more variety in their stripe layouts.
Even vs uneven designs - what’s the difference?
You might here checks and plaids described as even and uneven and it's useful to know which one you have as this affects how you cut your fabric. If you have an uneven design you'll need to pay attention to which way up you cut your fabric - decide which end of your fabric is the 'top' and be consistent.
To test what type you have, fold your fabric with the selvedges together, matching up the print below. Then pull the top corner back so you have a right angled triangle. If your check is even then the pattern will be continued unbroken. If it’s uneven, then the pattern will appear broken. The one I’m using in this post at first appears to be even, but if you look closely you can see that the yellow lines don’t continue, breaking the pattern and making it uneven.

Uneven
In this example you can see that despite most of the clear, dominant lines match up, the yellow lines don't match up exactly making this fabric an UNeven plaid fabric.

Even
In this example you can see that where the fabric is folded back, the lines of the plaid run continuously, which make this fabric an even plaid.
How much fabric to buy? When buying fabric, get more than you usually would to give yourself wiggle room. This will vary a bit from fabric to fabric, but I’d go with at least 50cm. If you’ve got a design with a larger scale repeat, especially if it’s uneven, then get more 80cm-1m should cover it!
How to check match
Using the Grainline Archer Pattern as an example
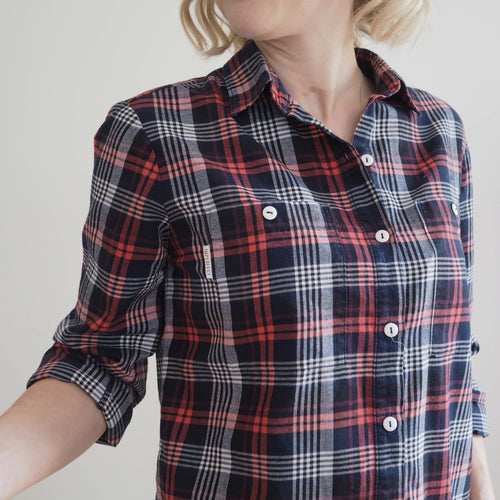
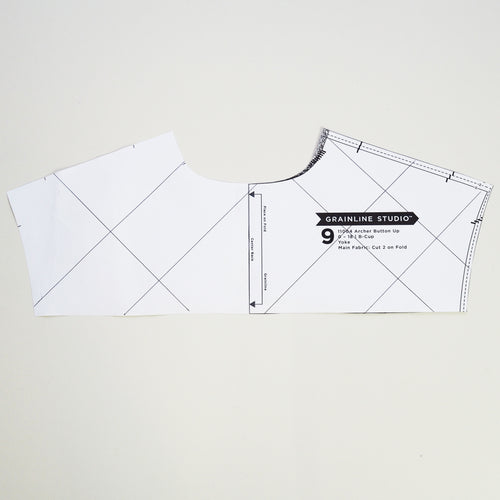
I’ll now explain the steps of pattern matching using the Grainline Archer Pattern as an example. It is a classic shirt, with a separate front placket, patch pockets, a back yoke, a traditional collar with collar stand and cuffs with plackets.
Perhaps the pattern you are using has different features but the key principles and steps will still be applicable. The key is to think ahead about what will happen to each bit of fabric once it has been sewn to another and where the actual stitching lines are. If you are struggling to visualise how it will come together, fold back the seam allowances and butt fabric sections up against each other and that will help you work out where certain pattern pieces need to be cut.
Preparing the pattern
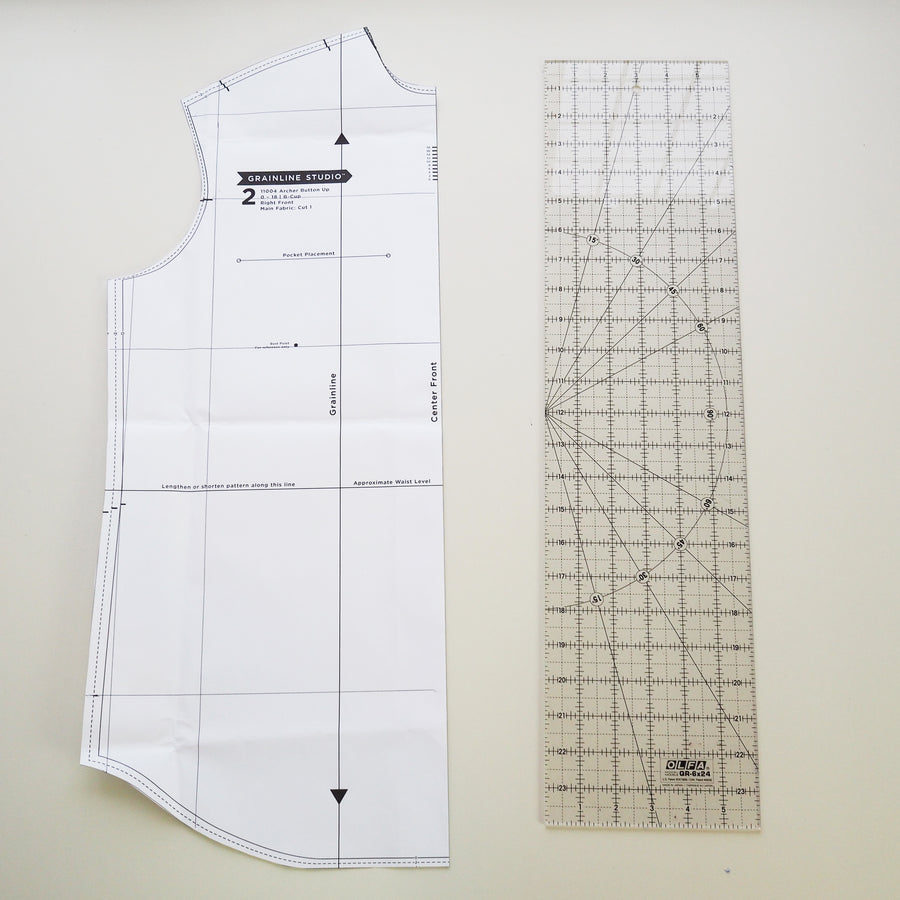
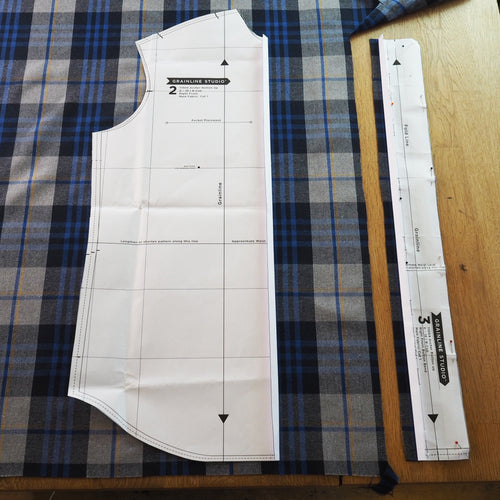
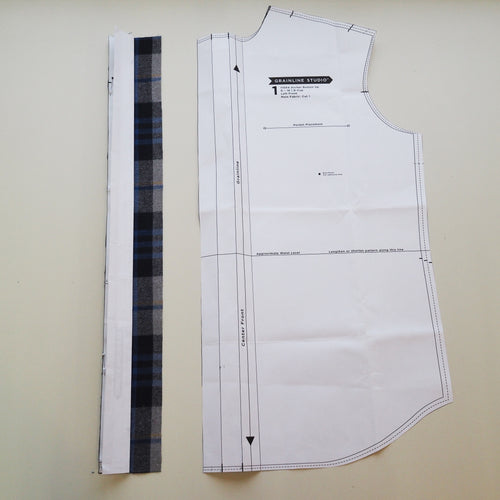
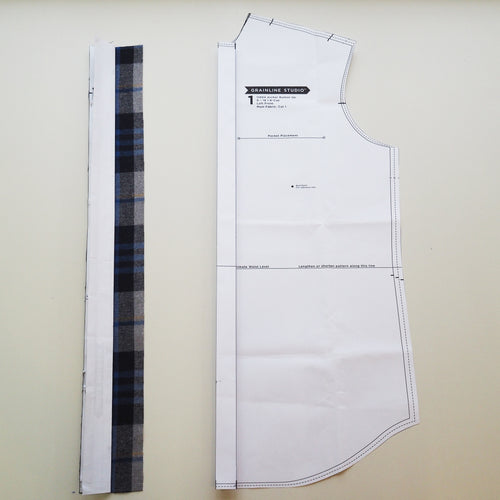
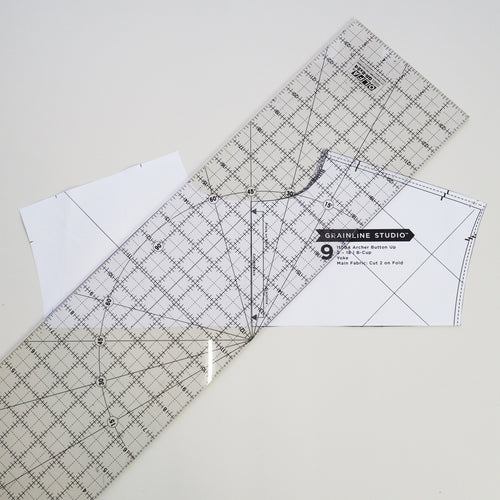
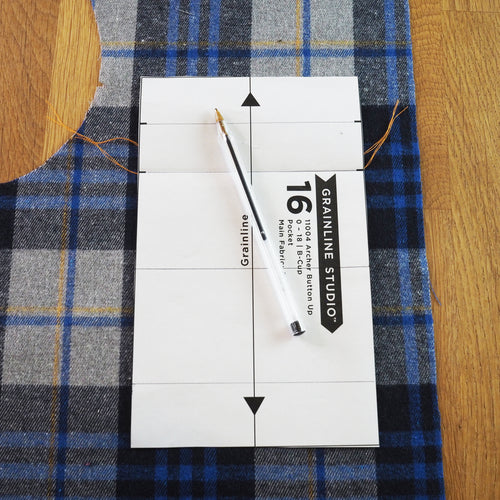
Before you cut your fabric, you first need to prepare your pattern. Tracing it onto lighter weight pattern paper such as dot and cross paper or Patterntrace Swedish tracing paper can help, as then you will be able to see the checks through the pattern piece.
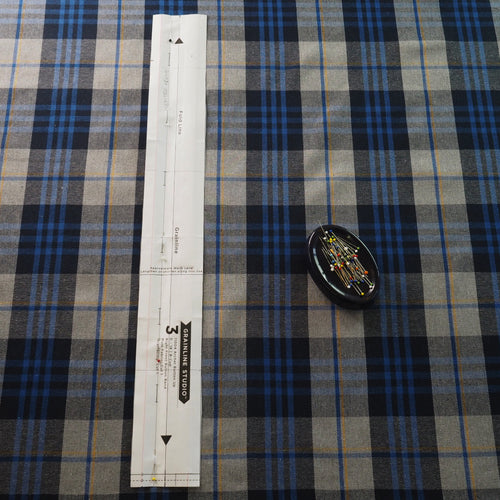
It is also helpful to draw gridlines onto your pattern pieces. Using the grainline as a reference point, draw lines at 90 degrees and 180 degrees on the pattern. They don’t need to be lined up with the checks but as a rough guide I would suggest around 4-5 horizontal lines and 3-4 vertical lines depending on the width of your pattern piece. This will create a grid on each pattern piece that you will then use to line up with the checks and make sure they are square.
Preparing the fabric and cutting out
- You will be cutting the fabric on the single layer so make sure it is pressed/ironed completely flat with no creases in it.
- I prefer to cut with the right side or outer side of the fabric facing up - if the checks in your fabric are woven into them, there may not be an obvious right a wrong side, in which case just pick and side and be consistent.
- Mark/label each section as you cut it out, making sure you know what is the right/outer facing side of the fabric.
- If you fabric is double sided, for example a double gauze with two different sized checks on each side, pick the bigger check to have facing up as you cut as it will be easier to line up with the gridlines on your pattern.
- Always cut the front of the garment first as it is visually the most important. Find the centre front of your garment. This could simply be in the middle of your pattern piece if it’s cut on the fold, it could be in the middle of your button placket (if it’s a shirt and that’s a separate piece) or it could be on the front bodice if the front edge gets folded back to create a placket. If this isn’t marked on your pattern, you might need to work ahead in your instructions, folding the paper pattern pieces as if they’ve been sewn to work out where the centre front is.
- For any square/rectangular pieces, it might be easier to not use the pattern pieces and instead cut along the checks and measure the width/length you need
- If you’re putting two pieces together that are quite different in size (e.g. a bodice that is gathered into a straight waistband) then just match the dominant line, for example at the centre front.
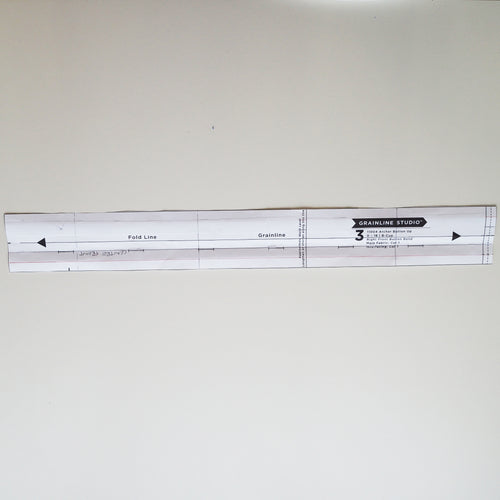
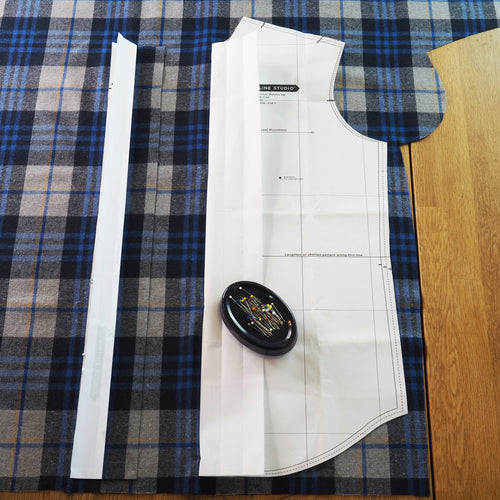
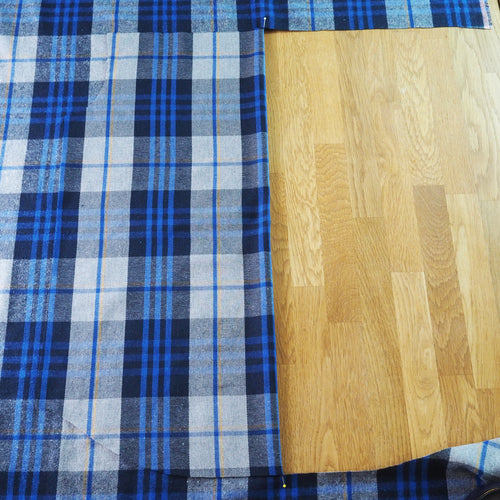
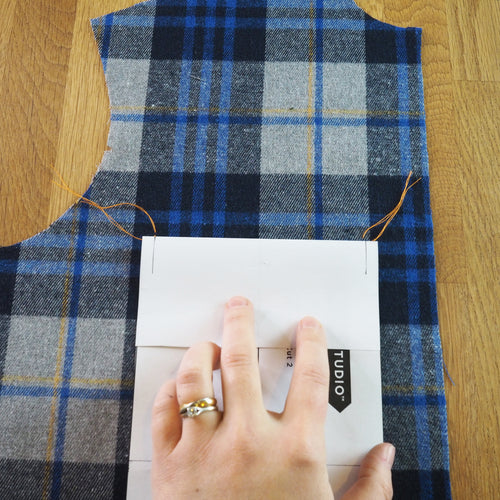
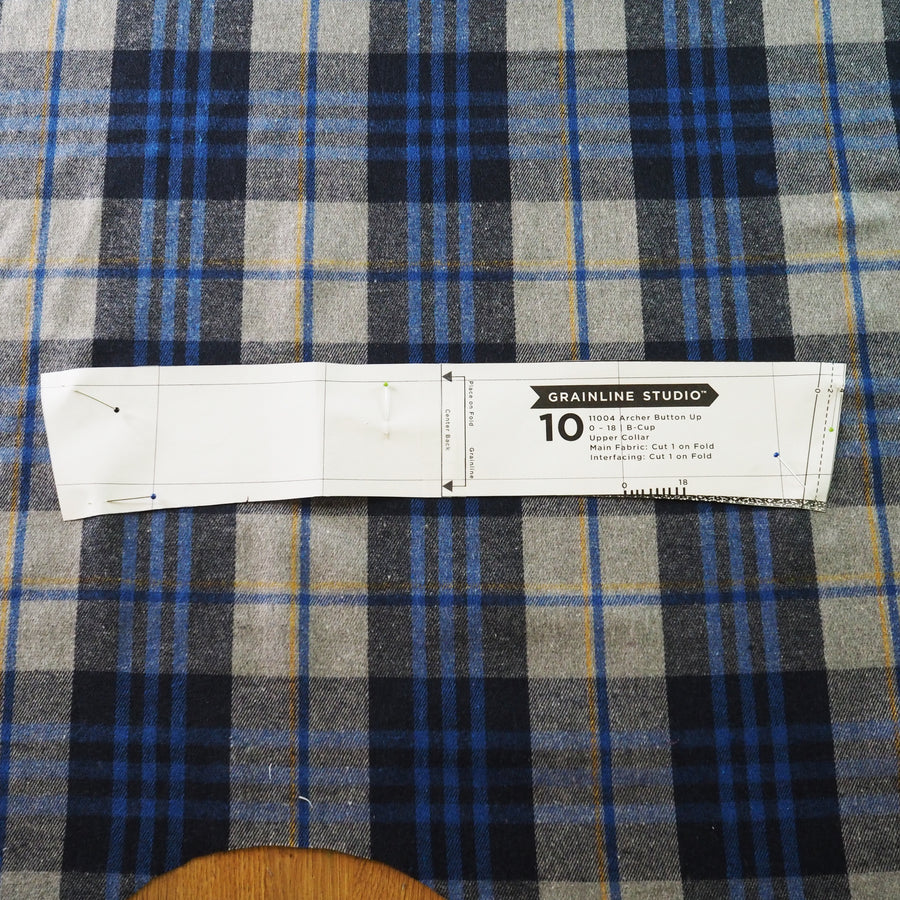
1. Cutting out the Button Placket
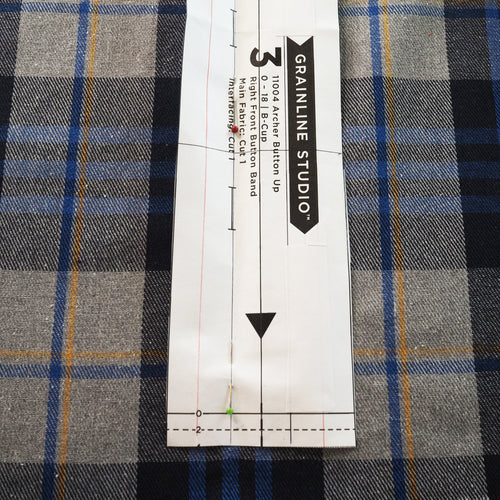
On my Archer Shirt the centre front is in the middle of the button placket. This will be the first pattern piece that I cut out. To work out where the centre front is within this placket pattern piece, I took the seam allowance off the edge that will join the bodice then marked halfway between this and the centrefold line (as my placket will eventually get folded in half). My seam allowance here is in red and I’ve marked the centre front in black (in line with the buttonhole markings).

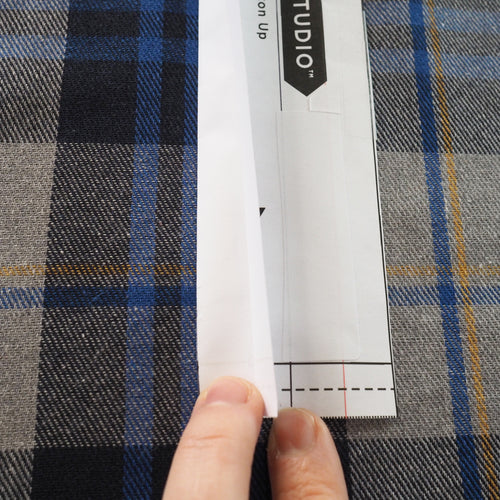
The centre front line should be positioned in between two lines or in the middle of a dominant line on your fabric (especially if you’re using an uneven check).
I folded the pattern piece back at this centre front line and aligned the fold with the dominant line I wanted to follow. I pinned along this line first before folding the pattern piece back down and making sure all the rest of the lines were straight. You might need to shift the rest of your fabric a little to do this - look for where the checks intersect the gridlines you drew on the pattern piece.
If your centre front needs to be cut on the fold you still need to cut the fabric on a single layer. So cut half of your bodice and flip as described for the back bodice below.
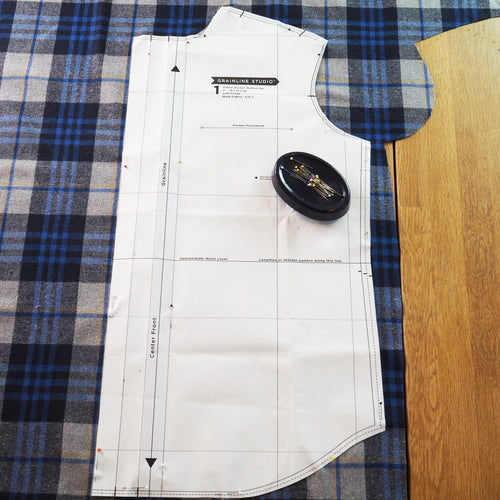
2. Cutting out the right front bodice - matching it to the button placket
Now move onto your next piece. For me, this is the right front bodice as this is the section that the button placket will be stitched onto. The centre front is actually marked on this pattern piece, meaning I could just align it with the same line as I did for the placket, but if it wasn’t then this is what you would do.
First, fold back the seam allowance at the edge of the front bodice. Then, on the placket, fold back the seam allowance on the pattern piece where it will join the bodice to reveal where the stitching line will be. Take your bodice and align the folded back edge with this same point. Make sure the horizontal lines at the top and bottom of the bodice and placket also match each other. Fold the front seam allowance back down and pin in place. Then pin round everywhere else, using the gridlines you drew across the pattern piece to make sure the fabric is straight.

3. Cutting out the left front bodice - matching it to the button placket
Next is my left front bodice - mine has a folded back button band, so I folded this into position and then folded it out of the way as the whole button band will be hidden under the top placket once sewn. Now fold the cut placket pattern piece back at the fold line to reveal where the placket will meet the bodice when the shirt is being worn. Align the folded edge of the left bodice front with the same point and pin along the fold line as before. Fold the button band back down and pin everything in place. Again, make sure the top and bottom is the same as on the placket and that the rest of the fabric is straight, using the gridlines on your pattern piece.

4. Cutting out the back bodice
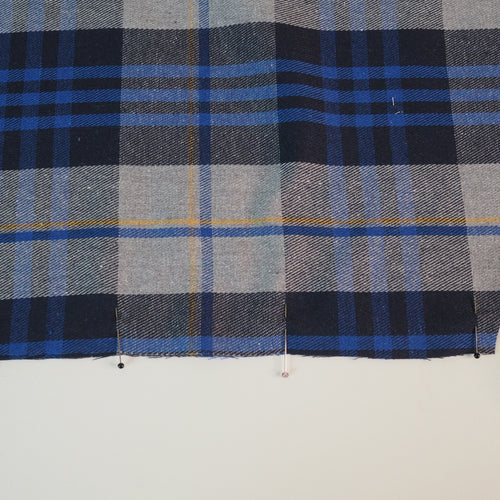
Moving onto the back bodice, make sure that the centre back is either on a dominant line or in between two lines. My back bodice is cut on the fold, so I’m lining up this fold line with the dominant line. If yours has a centre back seam then fold the seam allowance back before lining up with your chosen line (fold back down before cutting).
Once this is in position, look at the side seam - the bottom corner needs to be on the same horizontal line as on the front bodices. It might also be on the same line as the underarm, unless your pattern has a bust dart or other shaping. If it does, just make sure the horizontal lines below the bust dart to the hem match.
Pin all the way round and put pins at the top and bottom of the centre back and down it to remind yourself not to cut there if your piece needs to be cut on the fold.
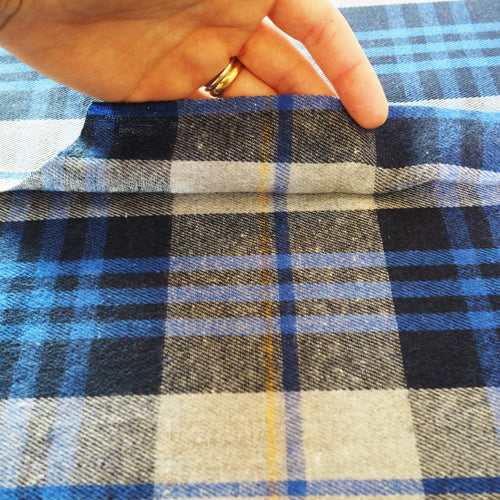
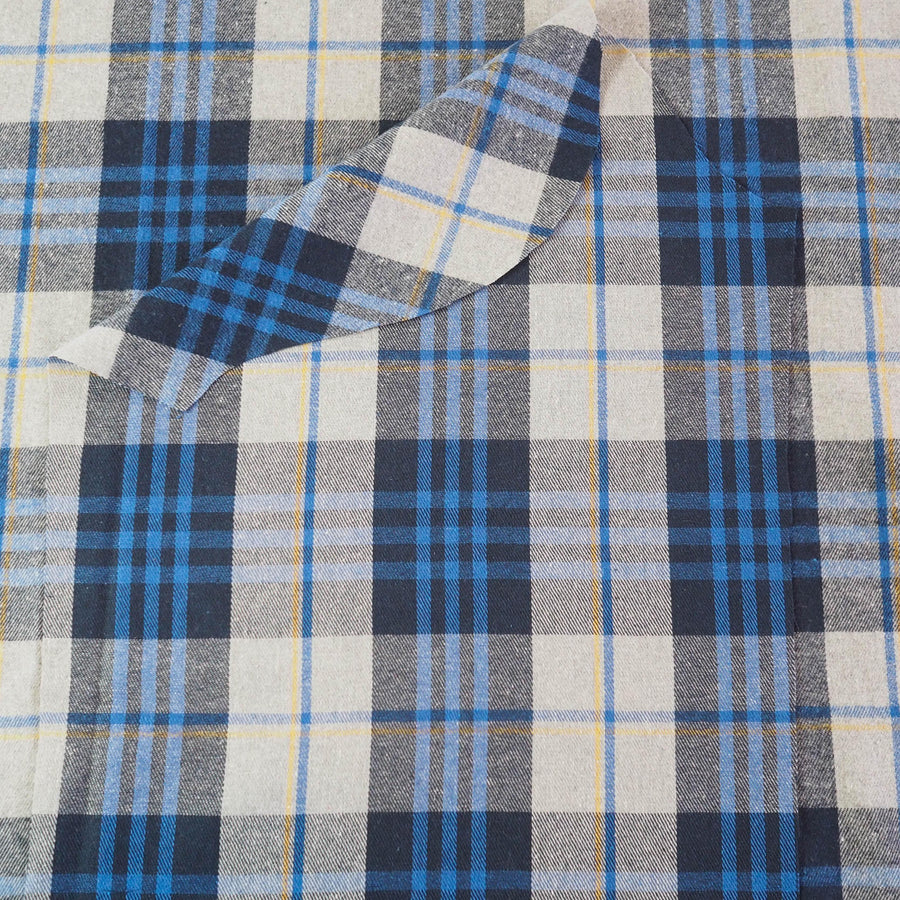
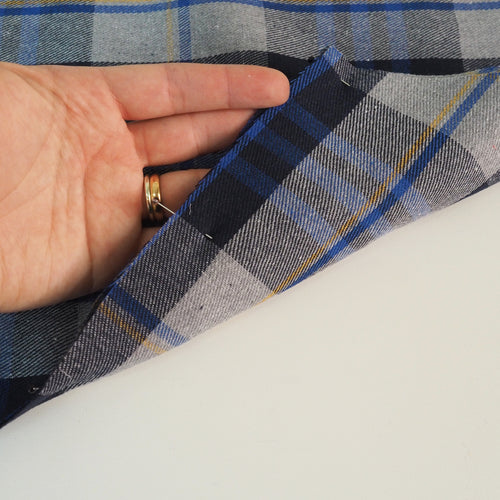
Unpin your pattern piece, remove the paper and flip the fabric over, rolling it down to align the second side. Go around the outer edge of the fabric, making sure that the checks match the fabric you have already cut; it should disappear into the fabric if your check is even!
If your fabric is uneven then some of the lines might not quite match (like the yellow ones in my print) but make sure that all the horizontal and vertical lines are straight. Pin and cut out.
If your pattern piece is not cut on the fold, then you will need to cut all the way round your pattern piece and flip as shown for the sleeve below.

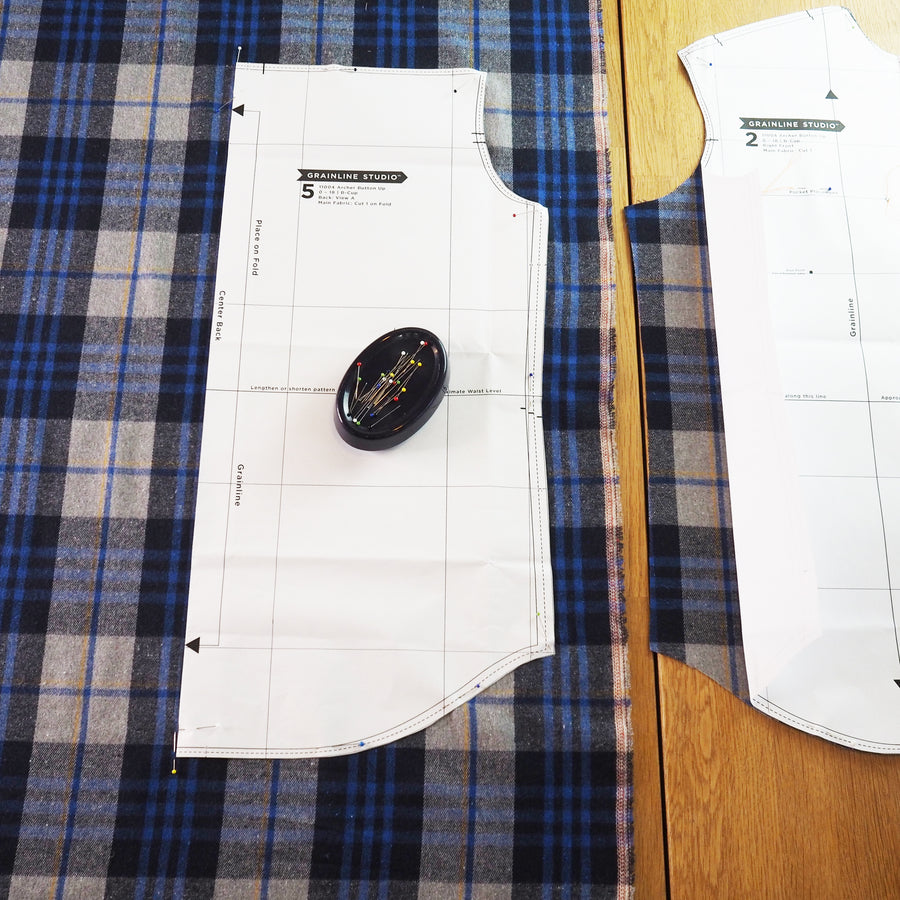
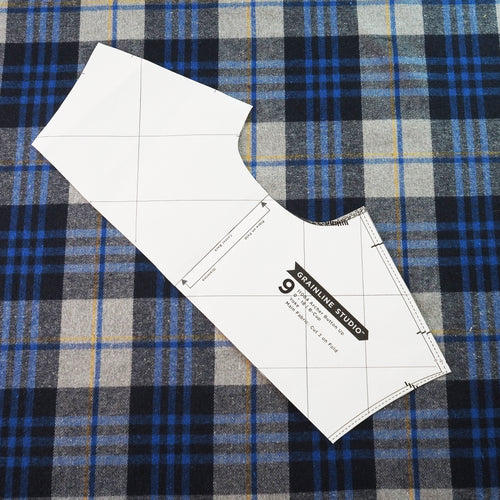
5. Cutting out the back yoke
For the yoke you can align the fold line with the same dominant line as the back bodice, but just note the rest of your print probably won’t be matched if you have to sew a pleat in the back bodice like I do.
Instead, I’m going to cut the outer yoke on the bias and stabilise it by cutting the inner yoke on grain.
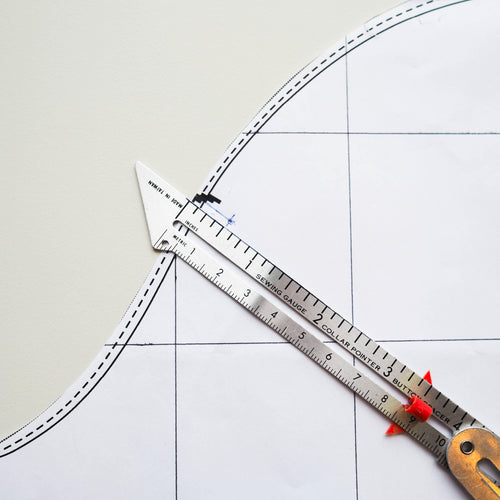
To do this, I’ve drawn out the full pattern piece. I’ve then used the 45 degree mark on my quilting ruler to draw gridlines onto it. I used these to align with my print and make sure the whole piece had the correct grain. Ignore these when you cut your inner yoke though!
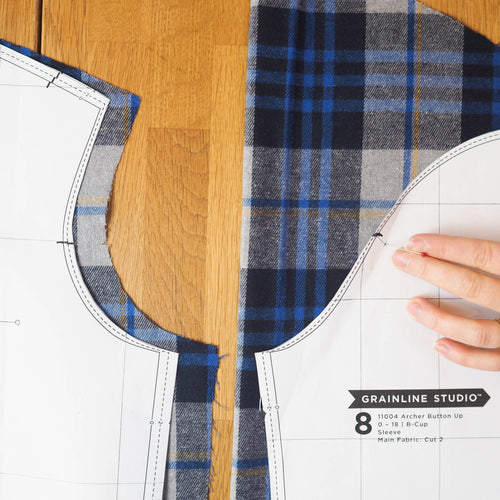
6. Cutting out the sleeves
For sleeves, I wouldn’t go to the extent of exactly matching the design across the seams, but I would make sure that the stripes at the front notch and underarm match the bodice. I'd also ensure that the gridlines on the pattern piece line up with the fabric.
To work out what line will intersect at the notch on the sleeve, take your sleeve pattern piece and measure the seam allowance in at the front single notch. This should be at 90 degrees to the raw edge. Put a little dot here.
When you come to cut your sleeve, look at where the notch on the bodice is. We want to line up the dot with the same line as where the notch is on the front bodice armhole. You can put a pin through the dot to help see where it’s hitting underneath. Pin into position and then check that all the gridlines of the pattern are straight horizontally and vertically before pinning in place and cutting out.
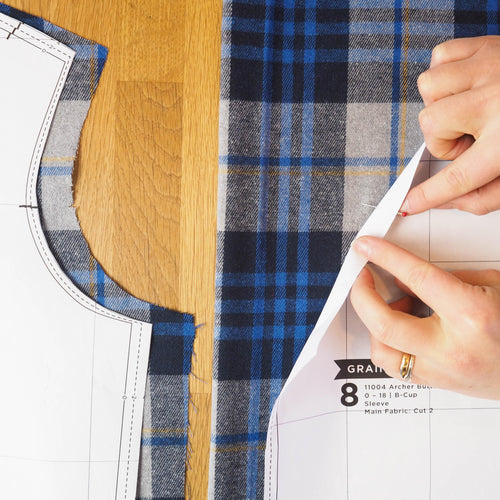
You can use this cut sleeve to cut out your second sleeve. Flip the cut fabric over and match up all the gridlines in the pattern - your cut piece should pretty much disappear into the fabric. Use this as a guide to cut out and make sure to transfer your notches.
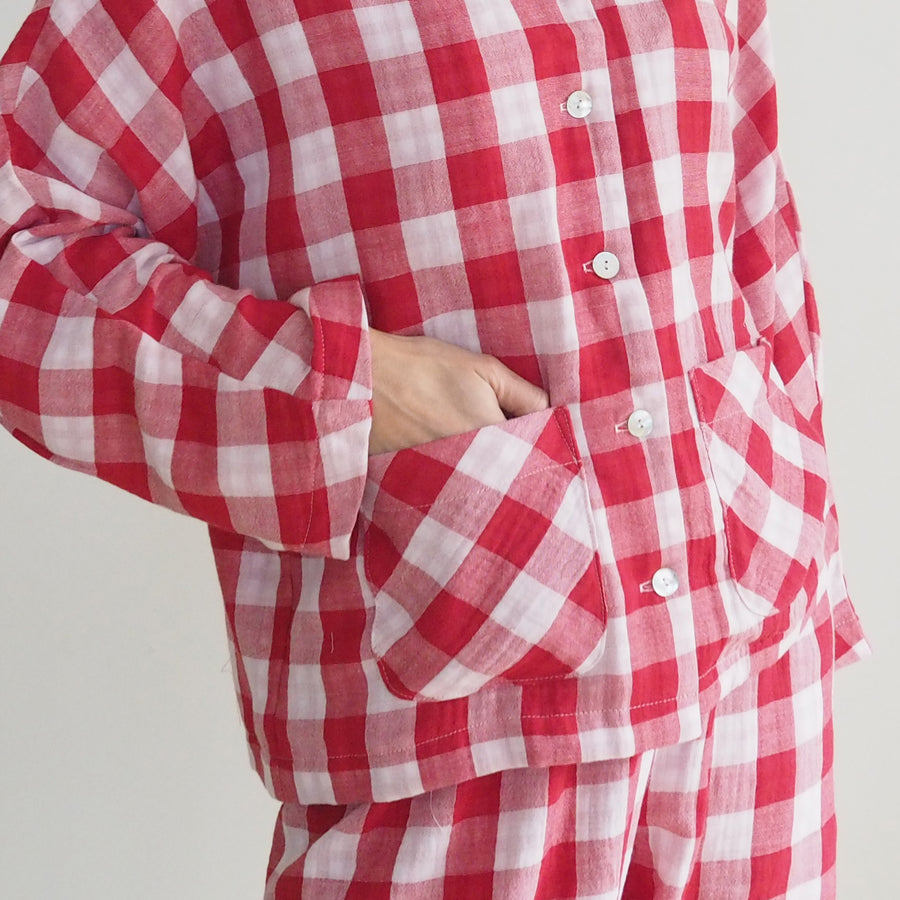
7. Cutting out pockets - matching them to each front bodice
For invisible pockets, fold back the top seam/hem allowance on the pocket, mark any other seam allowances on and place the pattern piece on the cut front bodice, aligning with the pocket markings.
Unfold the seam/hem allowance and take a photo of the pocket position. You could alternatively draw on a continuation of lines from the bodice.
Place the pattern piece onto your uncut fabric and match up the pattern - if you’re using the photo method then pay particular attention to the four corners of the pattern piece and make sure they’re at the same position as in your picture. It’s likely you will have to do each pocket separately so pin the pocket to the corresponding front bodice or make sure they are clearly labelled so you don’t get mixed up later.
8. Cutting out the cuffs and collar
On my shirt I can't match the cuffs all the way round because of the pleats in the sleeve, so I've made sure that these are deliberately not matched. You could also try matching from the pleats around to the cuff opening, or cutting them on the bias.
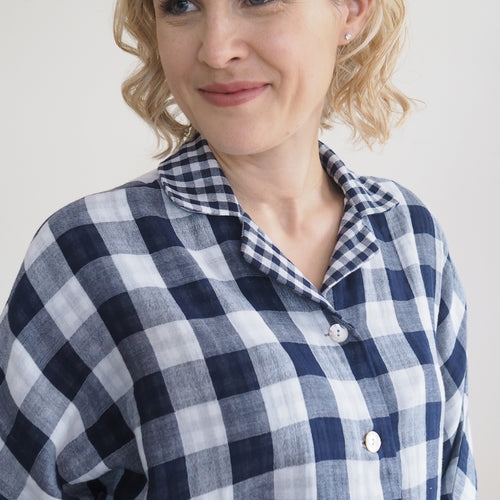
Don’t worry about pattern matching your collar and collar stand as it’s not necessary. Just make sure the pattern is straight on each piece and they are as symmetrical as possible. It can help to draw these pieces out in full to line them up, or flip the fabric at the fold line as I did for the back bodice.
Tips for sewing checks
Once you’ve cut your fabric then most of the hard work is done! When you come to sew the pieces together the checks become almost like extra notches or pattern marking landmarks that you can pin.
- I try to pin at regular points on the lines and then check that my pins are in the same place on the back of the seam. Sew right up to these pins and only remove them just before you get to them.
- Using a walking foot can also help the fabric feed through more evenly and keep your lines from shifting as you sew.
- You could always baste seams with a longer stitch length first to check that the checks still match once sewn. Then if you aren't happy with them its easy to remove the stitches. If you are happy with them then you can just sew over again with a regular stitch length.
I hope you have found this useful and get lots of satisfaction from matching your checks!!
